
I’ll never forget the feeling of panic when I noticed my beautiful veneer had a small crack. It was a routine morning, and suddenly, my reflection showed a tiny line where there shouldn’t be one. That moment made me realize how delicate and essential our smile can be to our confidence. I wondered, can I repair this myself without heading straight to the dentist for a costly replacement?
Dealing with a Cracked Veneer: Why It Matters
Veneers are a popular choice for achieving that picture-perfect smile. But even with the best care, they can chip or crack over time. Ignoring such damage can lead to further issues like sensitivity or even damage to the underlying tooth. The good news? In many cases, you don’t need to remove or replace the entire veneer. Instead, simple repairs can extend its life significantly—saving you money and discomfort.
Early on, I learned that a crack might seem minor but can worsen if left untreated. It’s like a tiny fault in a delicate piece of porcelain—it can spread and cause bigger problems. Recognizing this, I started researching how to fix a cracked veneer without removal, and what I found often surprised me. For example, some dentists use composite resin to repair chips and cracks, blending it seamlessly with the natural material. This approach not only preserves the veneer but also restores its strength and appearance. If you’re curious about the latest in cosmetic dentistry, check out cosmetic dentistry innovations for 2025.
But before you dive into repairs yourself, it’s crucial to weigh your options. Mistakes in repair, especially early on, can worsen the damage or cause additional issues. I made a mistake early in my journey—trying to fix it with glue I bought at the pharmacy—and it only made things worse. Trust me, not all adhesives are suitable for dental materials. That’s why consulting with a qualified cosmetic dentist is often the best course of action. Still, understanding what can be done at home can be empowering and save you a visit if the damage is minor.
Have you ever been faced with the dilemma of a cracked veneer and wondered if you could fix it yourself? You’re not alone. Keep reading; I’ll walk you through what worked for me and how you can prevent further damage.
Stay tuned as I share practical steps on how to repair your cracked veneer without removing it, along with tips to keep your smile looking flawless.
Assessing the Damage and Preparing Your Workspace
Start by examining the crack closely in natural light. Is it superficial or deep? Gather clean, sterilized tools—including a small mirror, dental composite resin kit, rubber gloves, and dental floss. Using a mirror, gently inspect the extent of the damage while ensuring your hands are clean to prevent infection. I remember a time when I accidentally knocked my veneer while trying to floss; taking a moment to evaluate prevented unnecessary mishaps.
Cleaning and Protecting the Veneer
Before attempting a repair, thoroughly clean the area with a soft toothbrush and non-abrasive toothpaste. Rinse with warm water to remove debris. Protect surrounding teeth and gums with a dental dam or piece of sugar-free gum pressed gently around the veneer if available, acting like a makeshift barrier, similar to how invisible braces align teeth gradually. During my initial attempt, I used a piece of wax paper to shield adjacent teeth—this minimized the risk of splattering composite resin onto unintended areas.
Applying the Composite Resin Effectively
Follow the manufacturer’s instructions to prepare the composite resin. Use a small, clean dental spatula or brush to apply a thin layer over the crack, pressing gently to ensure adhesion. Think of this step as patching a chipped ceramic mug; smooth and careful application results in a less noticeable repair. I once tried a hurried patch, which resulted in a lumpy finish—learning patience paid off with a seamless look.
Curing and Shaping the Repair
Use a curing light if recommended, holding it steadily over the resin for the specified duration, usually around 20 seconds. Shape the resin with your applicator or a fine-tipped dental instrument to match the natural contour of your veneer surface. This step is crucial for both aesthetics and function—imagine sculpting a tiny piece of clay to blend perfectly with your smile. After curing, gently polish the repaired area with polishing agents or a soft cloth. During my own repair, I used a handheld polishing tool, which enhanced the gloss and helped the fix blend seamlessly.
Final Checks and Maintenance
After the repair, examine the surface for any rough edges or excess resin and smooth accordingly. Avoid biting into hard foods or chewing on that side for 24 hours to allow the resin to fully set. Regular check-ups with your dentist can ensure the integrity of the repair, much like routine car maintenance maintains peak performance. If the crack persists or worsens, consulting a professional is advisable—do not hesitate to visit your local cosmetic dentist for assessment. Remember, DIY fixes are temporary solutions; the goal is to preserve your smile while planning a professional restoration if needed.
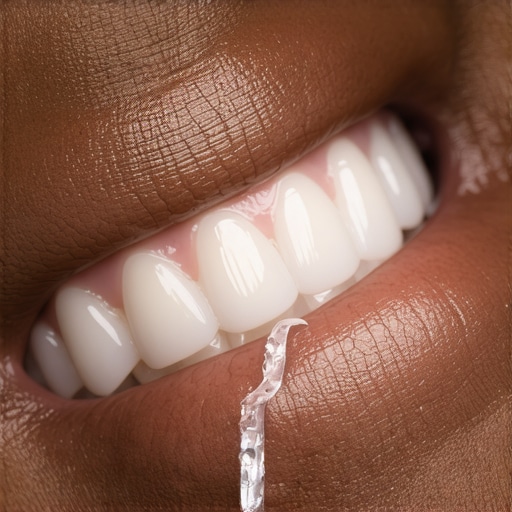 Many people believe they fully understand cosmetic dentistry, but beneath the surface lie nuanced truths and common myths that can lead to costly mistakes. For instance, a widespread misconception is that all dental veneers are permanent and cannot be repaired—yet, advanced techniques like composite resin repairs can often restore minor chips without replacing the entire veneer, saving time and money. However, attempting DIY fixes with inappropriate adhesives can cause irreversible damage, emphasizing the importance of consulting a qualified dentist. Moreover, there’s a misconception that Invisalign is only for teenagers; in reality, adult patients increasingly prefer this discreet option, with innovations set to make it even more effective in 2025. When it comes to teeth cleaning, many think more frequent visits mean cleaner teeth, but over-enthusiastic brushing can harm gums; proper techniques and professional cleanings, as outlined in [this guide](https://smilezdentist.com/teeth-cleaning-myths-debunked-by-top-dentists), are key to long-term health. For advanced readers, understanding the specific materials used in veneers and aligners helps prevent unnecessary damage—knowledge that can be gained from expert sources and the latest research. Do you believe you’ve avoided these pitfalls? Share your experiences and learn the real truths behind scams and misconceptions. Keep reading to discover how to make informed decisions that truly benefit your smile’s health and aesthetics.
Prioritize Quality Instruments for Lasting Results
Investing in the right tools can make all the difference in maintaining your smile over time. I personally rely on a high-quality dental curing light, like the Bluephase G2, for its precise wavelength and powerful performance, ensuring that composite repairs and whitening treatments fully set and last longer. Using a reliable curing light not only improves adhesion but also prevents premature failure of restorations, saving you frequent visits to the dentist.
Stay Ahead with Innovative Software Solutions
Software has revolutionized how dentists plan and execute treatments. I recommend using treatment planning software that incorporates 3D imaging and simulation. These tools allow for meticulous planning of procedures like Invisalign aligners or veneers, optimizing long-term results and reducing the need for corrective work later. Embracing digital technology ensures precision and creates a clear roadmap for your smile transformation.
Embrace Regular Maintenance for Effective Long-Term Care
Consistent maintenance is essential. I suggest scheduling professional cleanings every six months, combined with daily practices like fluoride rinse use and ultrasonic tongue cleaning tools. An ultrasonic cleaner equipped with a dental-grade ultrasonic scaler can effectively remove plaque and tartar from inaccessible areas, preventing decay and gum issues that could compromise your cosmetic investments. Remember, proactive maintenance preserves your smile’s health and appearance far better than reactive fixes.
Tools I Recommend for Perfecting Your Smile
Beyond professional gear, utilizing home-use whitening kits with LED activation (like the AuraGlow) can help maintain brightness between dental visits. For aligners, I trust the Invisalign Smile Assessment App, which tracks progress and helps catch issues early, aligned with insights from why Invisalign is set to dominate future orthodontics. Additionally, investing in a dental hygiene station with a water flosser (such as Waterpik) ensures thorough cleaning and reduces plaque buildup, contributing to longer-lasting results.
How Do I Maintain My Smile Over Time?
Consistent follow-up with your dentist, combined with the use of targeted tools for daily care and periodic professional treatments, ensures your dental work remains pristine. Incorporating advanced tools like laser-guided polishing devices or digital smile simulations can further enhance your routine. By staying informed about emerging technology—such as the upcoming innovations in cosmetic dentistry set for 2025—you can proactively protect your investment in your smile. Don’t forget to periodically review your procedures with your dentist, exploring options like latest Invisalign advancements to stay at the forefront of smile technology. Ready to elevate your dental routine? Try integrating a high-quality curing light into your maintenance kit today and witness improved longevity of your dental restorations.
What No One Tells You About Long-Term Smile Success
Over the years, I realized that achieving a beautiful smile isn’t just about the initial procedures; it’s about consistent care and understanding the nuances of cosmetic dentistry, invisalign, and teeth cleaning. One lightbulb moment was discovering that the materials used in veneers can last decades if properly maintained, but only if I avoided common pitfalls like neglecting regular check-ups. This insight pushed me to adopt a proactive approach, blending professional treatments with at-home habits that truly preserve my smile’s brilliance.
Tools and Resources That Keep My Smile Top-Notch
My essential toolkit includes a high-quality curing light, which maximizes the lifespan of my composite repairs. I also rely heavily on a water flosser—such as Waterpik—to keep my gums healthy and my restorations intact. For staying informed, I often consult latest cosmetic dentistry innovations to understand future trends and new technologies coming in 2025. For specific treatments, I trust the success stories of Invisalign patients which give me confidence in the choices I make for my orthodontic journey.
Embrace Your Power to Transform Your Dental Routine
Your smile is one of your most valuable assets—it deserves continuous attention and care. By integrating expert-recommended tools, staying updated on emerging treatments, and keeping routine maintenance in check, you can master the art of long-term dental beauty. Remember, your journey is unique, and small daily habits combined with professional guidance will lead you toward the smile you’ve always dreamed of. Ready to take charge of your dental health and aesthetics? Your best smile awaits—start today!
What’s the most surprising thing you’ve learned about maintaining your smile? Share your story below!
.