
I remember the moment vividly: I was sitting in my bathroom, trying to yank out my Invisalign tray, and suddenly, I felt this sharp tug that almost made me wince. My nails, which I had been so proud of, ended up looking worse than before. That lightbulb moment hit me—there has to be a better way. If you’ve ever wrestled with a stubborn Invisalign tray, you know the frustration: the awkward angles, the fear of hurting your gums, and oh, the risk to your nails!
Why a Stuck Invisalign Tray Can Turn Your Day Into a Challenge
Removing your Invisalign trays might seem simple at first—just pinch and pull, right? But when they refuse to budge, it feels like an impossible mission. A stuck tray can cause discomfort, anxiety about damaging your aligners, and even make you dread the next removal. Early on, I made the mistake of trying to force it with my nails, only to end up with a sore fingertip and a tray that’s more stuck than ever. Trust me, breaking your nails or hurting your gums isn’t worth it.
The real issue? Many don’t realize that improper removal techniques can lead to damage—both to your aligners and your oral health. According to the American Association of Orthodontists, improper handling can slow down your treatment progress and even cause minor injuries. So, the question is: how do we get those trays out gently, without risking nail injuries?
In the upcoming sections, I’ll share my tried-and-true methods—based on personal experience and expert tips—that will make Invisalign removal smoother, safer, and a lot less stressful. Ready to conquer that stubborn tray once and for all? Before we jump into the solutions, let’s address a common concern many have about this process.
Is Trying to Remove Your Invisalign Tray Without Damaging Your Nails Actually Possible?
Many worry that the solutions involve special tools or techniques that might seem intimidating. From my journey, I learned that the key is in using the right approach and a bit of patience—no fancy gadgets required. But I also made the mistake early on of trying to force the tray out with my nails, risking damage. Avoiding that mistake is crucial. For more insights into common Invisalign pitfalls, check out this article on [cosmetic dentistry myths](https://smilezdentist.com/cosmetic-dentistry-myths-debunked-what-you-really-need-to-know) to arm yourself with knowledge.
Stay tuned as I guide you through the gentle techniques that will make Invisalign removal quick, easy, and nail-friendly. You’ve got this—let’s get started.
Find the Perfect Grip for Your Tray
Start by locating the easiest corner of your aligner—usually at the back or side. Use the tip of your thumb and index finger to gently pinch the edge, mimicking how you would grip a fragile piece of glass. I recall my first attempt—my fingers trembling slightly—yet staying firm enough to get a secure hold. Avoid using your nails at this stage; they can tear the material or hurt your gums.
Use Your Oral Structures as Natural Tools
Rather than risking nail damage, leverage your tongue and cheeks. Gently move your tongue to push against the tray’s edge, loosening it from behind your teeth. Simultaneously, pressing your cheeks inward creates tension that can help pry the aligner loose without force. For instance, I once used a clean spoon handle to gently nudge the tray from the outside, which prevented nail stress and protected my smile.
Apply Controlled Pressure and Gentle Movements
Once you’ve got a grip, apply slow, consistent pressure—nothing jerky. Rock the tray back and forth slightly to loosen the fit. Think of it like opening a stubborn jar lid; patience is key. During my second attempt, I found that a rhythmic motion reduced resistance significantly, and I avoided resorting to sudden yanks that could damage the tray or hurt my gums.
Warm-up the Tray (if Necessary)
If the tray feels particularly stuck, a little warmth can soften the material. Use warm water (not hot) to soak the tray for a minute—it expands slightly, easing removal. I did this when my tray refused to budge after a weekend off; the gentle warmth made all the difference. Remember, don’t use extreme temperatures as they can warp the aligner.
Practice Consistency and Patience
Rome wasn’t built in a day, and neither is a flawless removal technique. Consistently applying these gentle methods reduces the risk of nail damage. Keep a calm mindset; rushing only leads to frustration or unintended injuries. My own experience showed that gradually building this gentle approach made Invisalign removal quicker and less stressful.
Seek Professional Advice When Needed
If the tray remains stubborn despite your careful efforts, consult your orthodontist. They can recommend specialized tools or techniques, such as soft dental picks designed for aligners, ensuring your nails and gums stay safe. Remember, ongoing frustration can sometimes indicate a need for professional guidance rather than stubbornness on your part.
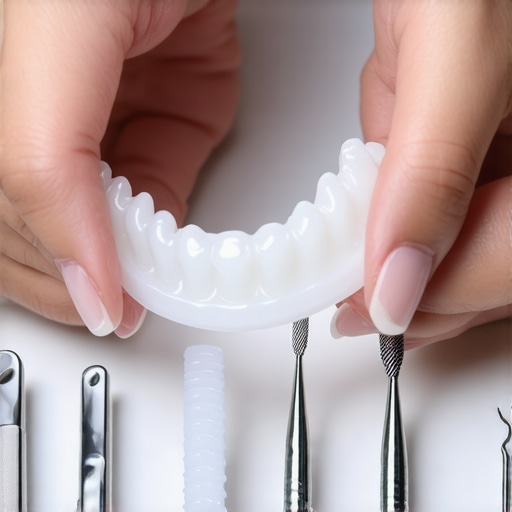 While many believe they fully understand cosmetic dentistry, teeth cleaning, and Invisalign, there are subtle nuances that often go unnoticed—leading to mistakes that can impact results and oral health. One prevalent myth is that more frequent whitening always equals brighter teeth, but overdoing it can actually damage enamel and cause sensitivity. In reality, professional guidance on whitening frequency ensures safety and longevity. Additionally, a common error is assuming that all teeth cleanings are equal; some traditional methods may not address underlying issues or minimize sensitivity, unlike modern innovations that emphasize gentle yet effective care.
Why Do Some Patients Experience Unexpected Sensitivity After Invisalign Treatment?
This question highlights a crucial aspect of advanced orthodontic care. Some orthodontists may overlook the importance of assessing enamel health and pre-existing sensitivity before starting Invisalign, which can lead to discomfort during or after treatment. According to a study published in the Journal of Clinical Orthodontics, personalized treatment plans that include enamel preservation strategies significantly reduce post-treatment sensitivity. Thus, aspiring for a perfect smile isn’t just about aligners—it’s about understanding the microscopic health of your teeth and prepping them properly.
Another common trap involves neglecting the importance of proper brushing techniques and tools. Many believe that brushing harder cleans better, but aggressive brushing can erode gums and enamel, counteracting cosmetic efforts. Instead, using correctly angled, soft-bristled brushes and gentle motions preserves your smile’s integrity. For those considering cosmetic procedures, it’s essential to select qualified professionals; in fact, choosing a dentist experienced in mainstream procedures like bonding or veneers can make a noticeable difference in results. Reading reviews and consulting expert resources—like this article on cosmetic dentistry myths—ensures informed decisions.
In conclusion, deep knowledge of these nuances enables you to approach cosmetic and dental care more confidently. From understanding the risks of over-whitening to recognizing the importance of enamel health, being informed helps prevent common pitfalls. Have you ever fallen into this trap? Let me know in the comments and share your experiences, so others can learn from your insights.
Keep Your Invisalign in Prime Condition
Maintaining your clear aligners isn’t just about cleaning; it involves using the right tools to ensure they stay clear and effective over time. Personally, I swear by a few specific items that have made my treatment smoother and more manageable.
Firstly, investing in a high-quality orthodontic cleaning tablet, like Invisalign’s official cleaning system, is essential. These tablets are formulated to remove plaque and biofilm without damaging the aligners. I use them weekly; soaking my trays in warm water with one of these tablets keeps them transparent and odor-free. Regular cleaning prevents buildup that can cause discoloration or staining, which is particularly important since many trends focus on aesthetic longevity. Modern cleaning innovations for dental appliances are evolving rapidly, so staying updated can enhance your results.
Secondly, get a dedicated soft-bristled toothbrush—preferably one designed for orthodontic appliances. I avoid using regular toothbrushes on my aligners as they can scratch the surface, leading to cloudy trays. Instead, I gently brush with my soft brush and warm water after meals before reinserting the aligners, reducing the risk of staining.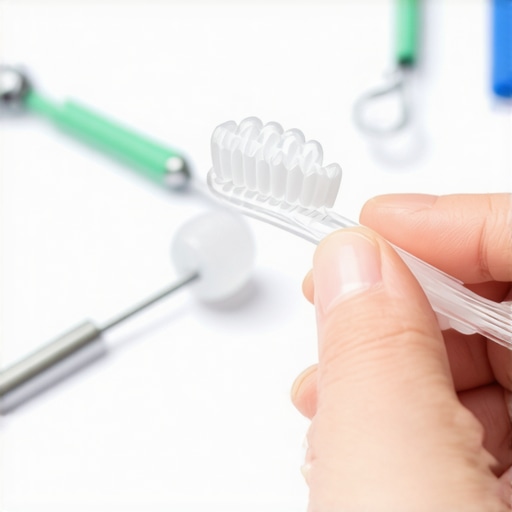
Third, a set of interdental brushes or dental picks made for orthodontic care can help clean hard-to-reach areas. I use a silicone tip cleaner, which I find gentle yet effective at removing stubborn debris from the edges and corners. Proper maintenance extends the life of your aligners and ensures they perform optimally throughout your treatment.
Future of Invisalign Maintenance
Looking ahead, I predict technology will further streamline this process. Innovations such as antimicrobial coatings for aligners or smart cleaning devices integrated with app controls may become mainstream. Protocols for maintenance might also become more personalized, utilizing AI-based monitoring to alert you when cleaning is due or if trays are damaged.
Ask Yourself: How Can I Keep My Invisalign Working Its Best
One of the simplest yet most impactful ways to ensure long-term success with Invisalign is committing to consistent maintenance routines. Using quality tools not only protects your investment but also keeps your treatment on track. If you’re curious about additional tips, explore expert advice on Invisalign care. I challenge you to incorporate a weekly soak with cleaner and a gentle brush into your routine—you’ll notice a difference in clarity and comfort. Remember, the effort you put into regular upkeep today will pay dividends in your radiant smile tomorrow.
Lessons the Dental Hacks Didn’t Want Me to Learn
- Patience is your best tool; rushing only makes removal harder and riskier. I found that slow, deliberate movements cut down on gum discomfort and nail damage.
- Leverage your natural oral anatomy instead of nails; my breakthrough was using my tongue and cheeks to loosen the aligner, saving my nails from tears and my gums from irritation.
- Warmth softens the tray, making stubborn trays easier to remove. A simple soak in warm water transformed my difficult removals into smooth experiences.
- Consistent gentle techniques build confidence—what was once a struggle became a quick and painless routine.
- When in doubt, seek professional guidance; orthodontists have specialized tools that can make stubborn trays vanish without risking damage or discomfort.
Gear Up with My Trusted Invisalign Care Arsenal
- High-quality cleaning tablets—these keep my trays clear and odor-free, extending their lifespan and ensuring oral health.
- Soft-bristled orthodontic brushes—gentle yet effective for daily cleaning, preserving the clarity of my aligners.
- Interdental silicone cleaners—reach those tricky edges without scratching or clouding the plastic.
- Smart apps and monitoring devices—future tech might remind you when it’s time to clean or alert you of potential issues, making maintenance effortless.
Keep Smiling and Take Control of Your Invisalign Journey
Your Invisalign experience is a personal journey—embrace gentle techniques, stay consistent, and don’t hesitate to reach out for professional advice. Remember, a confident smile starts with careful, nail-friendly removal and maintenance routines. Take action today, and your future self will thank you for the radiant, healthy smile you’re building.