
I still remember the absolute horror of opening my best friend’s wedding album. That morning, I had stood in front of my bathroom mirror, admired my freshly brushed smile, and felt like a million bucks. But in those high-definition wedding photos, my teeth looked shockingly dark, almost like I had skipped brushing for a month. I felt an immediate pit in my stomach. Why did my reflection lie to me? If you have ever cringed at a group photo because your teeth suddenly looked dull, yellow, or grey, you are not alone. It is a incredibly frustrating trick of light, camera tech, and human anatomy.
The Ugly Truth About Camera Lenses and Your Smile
The main culprit behind this photographic betrayal isn’t actually your oral hygiene. It boils down to how digital cameras capture light compared to our eyes. Human eyes are incredibly advanced; they automatically adjust to ambient lighting, smoothing out minor color variations. Camera sensors, on the other hand, are brutally honest and often exaggerate shadows inside your mouth. I used to think my teeth were permanently stained and rushed to buy abrasive charcoal pastes, which was a huge mistake. That harsh scrubbing actually wore down my enamel, making the darker dentin layer underneath show through even more. If you are struggling with a similar dullness, understanding how cosmetic dentistry for discolored teeth works can help restore that natural brightness without damaging your enamel.
Are camera flashes actually making your teeth look worse?
Yes, they absolutely can. When a camera flash fires directly at your face, the light passes straight through the translucent outer layer of your enamel and bounces off the darker, yellow-toned dentin underneath. The camera captures this deep bounce-back, making your teeth appear several shades darker than they look in the soft, diffused light of your bathroom. In fact, according to research published by the National Institutes of Health, physical tooth structure and surface texture play a massive role in how light scatters, meaning flat or rough tooth surfaces look significantly darker under direct electronic flash than in natural, indirect light. Have you ever noticed your smile looking surprisingly yellow in a phone selfie, even right after a dental visit? Tell me about your most frustrating photo moments in the comments below. Today, we are going to dive into the exact science behind this optical illusion and look at easy, practical ways to make sure your real-life smile finally matches what the camera captures.
When I realized my camera-ready smile was actually a camera-shy disaster, I didn’t just accept defeat. I started experimenting with my phone camera, different room angles, and dental products to find out how to beat this optical trap. Think of your teeth like a semi-translucent gemstone; if you shine a harsh light directly at it, you don’t see its beautiful surface detail, you just see right through it to the dark background behind. To stop your teeth from looking instantly grey or yellow the second a shutter clicks, you need to change how you prepare your smile and how you position yourself in front of the lens.
Change Your Angle to Defeat Harsh Camera Shadows
The easiest fix requires zero cosmetic work and takes exactly two seconds. Instead of standing directly beneath an overhead light bulb or facing a harsh direct flash, you want to position your face toward a soft, natural light source, like a window. I remember a particularly painful family portrait session where my teeth looked practically blue because of the overhead office lighting. I stepped two feet back, tilted my chin up slightly toward the window, and the blue cast completely vanished. If you frequently notice this cool, shadowy tint in your photos, you might want to read about why your teeth look blue in certain lighting to understand the science behind it.
The Tongue Trick for Instant Brightness
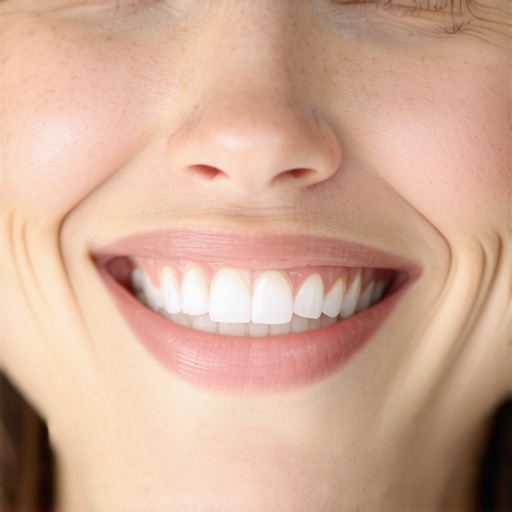
Before you smile for a photo, try pressing your tongue gently against the roof of your mouth, just behind your front teeth. This acts like a physical backboard. By blocking the dark, empty cavern of your throat, you prevent light from passing straight through your translucent enamel and registering as a dark shadow. It is a quick hack I learned from a wedding photographer, and it makes a massive, immediate difference in close-up snapshots.
The Long-Term Fix Starts with Proper Surface Maintenance
While quick camera tricks help in a pinch, they cannot replace the pristine light-reflecting qualities of a healthy, clean tooth surface. Over time, microscopic plaque buildup and surface stains act like a matte finish on a glossy car, absorbing light instead of bouncing it back to the camera sensor. If you have noticed that your teeth look dull even in perfect lighting, it might be time to strip away that film.
Why Charcoal Pastes Are Not the Answer
Many people rush to buy charcoal or highly abrasive toothpastes when they see a dark photo. I did this myself, only to find my teeth looked even darker a month later. The harsh particles scraped away my protective enamel, exposing the naturally yellow dentin underneath. To truly understand why this happens, you should explore the truth about charcoal toothpaste and your tooth enamel. Instead of scrubbing away your smile’s natural defense system, focus on gentle, professional-grade maintenance that lifts stains without scratching the surface.
Schedule a Professional Polish to Restore Natural Shine
The most effective way to restore the glass-like texture of your enamel is through a professional scaling and polish. A dental hygienist uses specialized, gentle tools to remove hardened tartar and smooth out the micro-roughness of your teeth. This smooth surface allows light to bounce off your teeth cleanly, giving you that bright, natural reflection in photos without the need for heavy digital filters or aggressive whitening products.
When we talk about achieving a truly camera-ready smile, most people fall into the trap of thinking it is a simple matter of bleaching their teeth as white as paper. We have all seen those overly bright, unnatural smiles in social media feeds, which actually look incredibly artificial under professional lenses. True aesthetic harmony is not about chasing a blinding shade of white; it is about managing how light interacts with the natural anatomy of your teeth. Let us dig deeper into the actual physics of light refraction and look at what most people get wrong when trying to prep their smiles for the camera.
The Translucency Illusion That Bleaching Can Actually Ruin
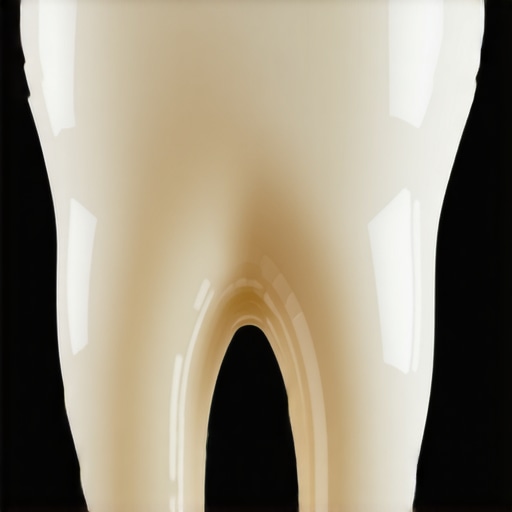
Everyone says that aggressive whitening is the ultimate shortcut to a photogenic smile, but in my experience, over-whitening works against you. Your teeth are not solid pieces of opaque chalk. They are multi-layered structures consisting of highly translucent enamel on the outside and dense, yellow-toned dentin on the inside. When you abuse over-the-counter whitening strips, you risk striping away the essential mineral micro-layers of your enamel. This makes the outer layer increasingly see-through. In photographic terms, instead of reflecting light back at the camera, your teeth begin to absorb it, creating a dark, glassy, or even greyish appearance under direct flashes. If you are struggling with this specific issue, you might want to learn about why your teeth look grey instead of yellow and what it means before buying another box of whitening strips.
Why does your smile still look dark even after professional cosmetic treatments?
The answer lies in the micro-texture of your tooth surfaces. Many patients invest in high-end cosmetic procedures but skip the fundamental step of regular, clinical surface maintenance. According to a study published by the National Institutes of Health, even the minor surface roughness caused by daily wear and tear can scatter light in a chaotic pattern, reducing overall luster by up to forty percent. When light scatters instead of bouncing back in a clean, specular reflection, the camera sensor registers the area as a shadow, making your teeth look dull regardless of their actual shade. This is why undergoing specialized treatments, like modern teeth cleaning innovations that reduce sensitivity and boost results, is so critical. These advanced cleanings polish away microscopic imperfections, allowing light to reflect evenly and create that coveted glossy, natural shine.
The Trap of Chasing Uniformity over Natural Contours
The biggest “oops” factor in modern cosmetic dentistry is trying to make every single tooth perfectly flat and uniform. Human teeth naturally have subtle ridges, curves, and varied translucent edges. When people demand perfectly flat, opaque veneers or undergo aggressive bonding that covers these natural contours, they end up with a flat, blocky smile that looks incredibly fake in high-definition photos. A skilled cosmetic dentist knows how to preserve these light-reflecting micro-textures to ensure your smile has depth and life. If you want to avoid looking like you are wearing a plastic mouthguard in your next family portrait, it is vital to read up on cosmetic dentistry myths debunked what you really need to know. Have you ever fallen into this trap of over-whitening or chasing perfect flatness only to be disappointed by the camera? Let me know in the comments below.
When you stop chasing immediate, destructive quick-fixes like harsh abrasive pastes and focus instead on long-term surface preservation, the way light interacts with your teeth changes entirely. If you want a smile that looks consistently luminous on camera and in real life, you have to treat your dental maintenance like a high-end camera lens routine. You wouldn’t clean a DSLR lens with sandpaper, so you shouldn’t treat your enamel any differently.
The Tech-Forward Tools I Personally Use to Keep My Smile Photogenic
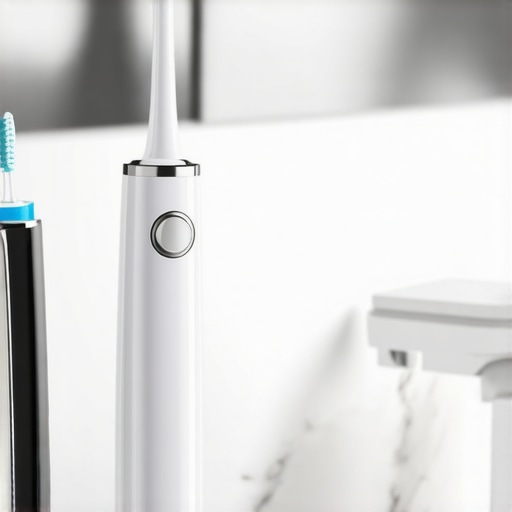
To keep my enamel smooth enough to bounce camera flashes away without creating dark shadows, I have completely overhauled my home setup. First, I threw out manual brushes. I now use an ultrasonic toothbrush set to a maximum of thirty thousand vibrations per minute. High-frequency vibration micro-cleans the plaque biofilm that acts as a light-absorbing matte finish on your teeth. Next, I swapped traditional string floss for a high-powered dental water jet. I found that typical string often shreds or leaves micro-debris between tight teeth, which instantly shows up as tiny dark gaps on high-resolution camera sensors.
Using a water jet cleans those hard-to-reach pockets, which is especially important if you are undergoing clear aligner therapy. If you are currently transforming your alignment, you know how crucial cleanliness is to keep those plastic trays invisible. You might want to read about my favorite invisalign maintenance expert tips for clear confident smiles to ensure your aligners don’t get cloudy and ruin your look. Additionally, I rely on a pH-neutralizing pre-rinse containing sodium chlorite rather than alcohol. Alcohol-based mouthwashes dry out the oral mucosa, reducing the natural saliva coating that gives your teeth their healthy, specular reflection under camera lights.
How do I maintain my photogenic dental results over time?
Consistency is key, but you must also avoid over-processing. I maintain my results by scheduling clinical cleanings twice a year to polish away microscopic surface stains that regular brushing cannot touch. According to the official clinical guidelines published by the American Dental Association (ADA), professional dental prophylaxis utilizing selective polishing pastes with low relative dentin abrasivity (RDA) values is the safest, most effective way to maintain surface smoothness without damaging protective enamel layers. Between these professional visits, I strictly adhere to a maintaining your teeth cleaning routine for long term health strategy that focuses on remineralizing toothpastes containing nano-hydroxyapatite to patch up microscopic enamel scratches.
Where the Future of Picture-Perfect Smile Design is Going
We are rapidly moving away from the era of heavy, opaque, “one-size-fits-all” cosmetic enhancements. I predict that the future of cosmetic dentistry lies in 3D-printed biomimetic materials. Within the next few years, we will see custom-printed ultrathin veneers that perfectly mimic the unique refractive index and light-scattering properties of your natural enamel. Instead of completely covering your natural structure, dentists will use AI-driven software to map exactly where light bounces off your face, applying microscopic adjustments only where needed. If you want to stay ahead of the curve, try the simple tongue-positioning trick during your very next photo shoot today, and see the immediate difference in how light reflects off your teeth.
I still remember the absolute horror of opening my best friend’s wedding album. That morning, I had stood in front of my bathroom mirror, admired my freshly brushed smile, and felt like a million bucks. But in those high-definition wedding photos, my teeth looked shockingly dark, almost like I had skipped brushing for a month. I felt an immediate pit in my stomach. Why did my reflection lie to me? If you have ever cringed at a group photo because your teeth suddenly looked dull, yellow, or grey, you are not alone. It is a incredibly frustrating trick of light, camera tech, and human anatomy.
The Ugly Truth About Camera Lenses and Your Smile
The main culprit behind this photographic betrayal isn’t actually your oral hygiene. It boils down to how digital cameras capture light compared to our eyes. Human eyes are incredibly advanced; they automatically adjust to ambient lighting, smoothing out minor color variations. Camera sensors, on the other hand, are brutally honest and often exaggerate shadows inside your mouth. I used to think my teeth were permanently stained and rushed to buy abrasive charcoal pastes, which was a huge mistake. That harsh scrubbing actually wore down my enamel, making the darker dentin layer underneath show through even more. If you are struggling with a similar dullness, understanding how cosmetic dentistry for discolored teeth works can help restore that natural brightness without damaging your enamel.
Are camera flashes actually making your teeth look worse?
Yes, they absolutely can. When a camera flash fires directly at your face, the light passes straight through the translucent outer layer of your enamel and bounces off the darker, yellow-toned dentin underneath. The camera captures this deep bounce-back, making your teeth appear several shades darker than they look in the soft, diffused light of your bathroom. In fact, according to research published by the National Institutes of Health, physical tooth structure and surface texture play a massive role in how light scatters, meaning flat or rough tooth surfaces look significantly darker under direct electronic flash than in natural, indirect light. Have you ever noticed your smile looking surprisingly yellow in a phone selfie, even right after a dental visit? Tell me about your most frustrating photo moments in the comments below. Today, we are going to dive into the exact science behind this optical illusion and look at easy, practical ways to make sure your real-life smile finally matches what the camera captures.
When I realized my camera-ready smile was actually a camera-shy disaster, I didn’t just accept defeat. I started experimenting with my phone camera, different room angles, and dental products to find out how to beat this optical trap. Think of your teeth like a semi-translucent gemstone; if you shine a harsh light directly at it, you don’t see its beautiful surface detail, you just see right through it to the dark background behind. To stop your teeth from looking instantly grey or yellow the second a shutter clicks, you need to change how you prepare your smile and how you position yourself in front of the lens.
Change Your Angle to Defeat Harsh Camera Shadows
The easiest fix requires zero cosmetic work and takes exactly two seconds. Instead of standing directly beneath an overhead light bulb or facing a harsh direct flash, you want to position your face toward a soft, natural light source, like a window. I remember a particularly painful family portrait session where my teeth looked practically blue because of the overhead office lighting. I stepped two feet back, tilted my chin up slightly toward the window, and the blue cast completely vanished. If you frequently notice this cool, shadowy tint in your photos, you might want to read about why your teeth look blue in certain lighting to understand the science behind it.
The Tongue Trick for Instant Brightness
Before you smile for a photo, try pressing your tongue gently against the roof of your mouth, just behind your front teeth. This acts like a physical backboard. By blocking the dark, empty cavern of your throat, you prevent light from passing straight through your translucent enamel and registering as a dark shadow. It is a quick hack I learned from a wedding photographer, and it makes a massive, immediate difference in close-up snapshots.
The Long-Term Fix Starts with Proper Surface Maintenance
While quick camera tricks help in a pinch, they cannot replace the pristine light-reflecting qualities of a healthy, clean tooth surface. Over time, microscopic plaque buildup and surface stains act like a matte finish on a glossy car, absorbing light instead of bouncing it back to the camera sensor. If you have noticed that your teeth look dull even in perfect lighting, it might be time to strip away that film.
Why Charcoal Pastes Are Not the Answer
Many people rush to buy charcoal or highly abrasive toothpastes when they see a dark photo. I did this myself, only to find my teeth looked even darker a month later. The harsh particles scraped away my protective enamel, exposing the naturally yellow dentin underneath. To truly understand why this happens, you should explore the truth about charcoal toothpaste and your tooth enamel. Instead of scrubbing away your smile’s natural defense system, focus on gentle, professional-grade maintenance that lifts stains without scratching the surface.
Schedule a Professional Polish to Restore Natural Shine
The most effective way to restore the glass-like texture of your enamel is through a professional scaling and polish. A dental hygienist uses specialized, gentle tools to remove hardened tartar and smooth out the micro-roughness of your teeth. This smooth surface allows light to bounce off your teeth cleanly, giving you that bright, natural reflection in photos without the need for heavy digital filters or aggressive whitening products.
When we talk about achieving a truly camera-ready smile, most people fall into the trap of thinking it is a simple matter of bleaching their teeth as white as paper. We have all seen those overly bright, unnatural smiles in social media feeds, which actually look incredibly artificial under professional lenses. True aesthetic harmony is not about chasing a blinding shade of white; it is about managing how light interacts with the natural anatomy of your teeth. Let us dig deeper into the actual physics of light refraction and look at what most people get wrong when trying to prep their smiles for the camera.
The Translucency Illusion That Bleaching Can Actually Ruin
Everyone says that aggressive whitening is the ultimate shortcut to a photogenic smile, but in my experience, over-whitening works against you. Your teeth are not solid pieces of opaque chalk. They are multi-layered structures consisting of highly translucent enamel on the outside and dense, yellow-toned dentin on the inside. When you abuse over-the-counter whitening strips, you risk striping away the essential mineral micro-layers of your enamel. This makes the outer layer increasingly see-through. In photographic terms, instead of reflecting light back at the camera, your teeth begin to absorb it, creating a dark, glassy, or even greyish appearance under direct flashes. If you are struggling with this specific issue, you might want to learn about why your teeth look grey instead of yellow and what it means before buying another box of whitening strips.
Why does your smile still look dark even after professional cosmetic treatments?
The answer lies in the micro-texture of your tooth surfaces. Many patients invest in high-end cosmetic procedures but skip the fundamental step of regular, clinical surface maintenance. According to a study published by the National Institutes of Health, even the minor surface roughness caused by daily wear and tear can scatter light in a chaotic pattern, reducing overall luster by up to forty percent. When light scatters instead of bouncing back in a clean, specular reflection, the camera sensor registers the area as a shadow, making your teeth look dull regardless of their actual shade. This is why undergoing specialized treatments, like modern teeth cleaning innovations that reduce sensitivity and boost results, is so critical. These advanced cleanings polish away microscopic imperfections, allowing light to reflect evenly and create that coveted glossy, natural shine.
The Trap of Chasing Uniformity over Natural Contours
The biggest “oops” factor in modern cosmetic dentistry is trying to make every single tooth perfectly flat and uniform. Human teeth naturally have subtle ridges, curves, and varied translucent edges. When people demand perfectly flat, opaque veneers or undergo aggressive bonding that covers these natural contours, they end up with a flat, blocky smile that looks incredibly fake in high-definition photos. A skilled cosmetic dentist knows how to preserve these light-reflecting micro-textures to ensure your smile has depth and life. If you want to avoid looking like you are wearing a plastic mouthguard in your next family portrait, it is vital to read up on cosmetic dentistry myths debunked what you really need to know. Have you ever fallen into this trap of over-whitening or chasing perfect flatness only to be disappointed by the camera? Let me know in the comments below.
When you stop chasing immediate, destructive quick-fixes like harsh abrasive pastes and focus instead on long-term surface preservation, the way light interacts with your teeth changes entirely. If you want a smile that looks consistently luminous on camera and in real life, you have to treat your dental maintenance like a high-end camera lens routine. You wouldn’t clean a DSLR lens with sandpaper, so you shouldn’t treat your enamel any differently.
The Tech-Forward Tools I Personally Use to Keep My Smile Photogenic
To keep my enamel smooth enough to bounce camera flashes away without creating dark shadows, I have completely overhauled my home setup. First, I threw out manual brushes. I now use an ultrasonic toothbrush set to a maximum of thirty thousand vibrations per minute. High-frequency vibration micro-cleans the plaque biofilm that acts as a light-absorbing matte finish on your teeth. Next, I swapped traditional string floss for a high-powered dental water jet. I found that typical string often shreds or leaves micro-debris between tight teeth, which instantly shows up as tiny dark gaps on high-resolution camera sensors.
Using a water jet cleans those hard-to-reach pockets, which is especially important if you are undergoing clear aligner therapy. If you are currently transforming your alignment, you know how crucial cleanliness is to keep those plastic trays invisible. You might want to read about my favorite invisalign maintenance expert tips for clear confident smiles to ensure your aligners don’t get cloudy and ruin your look. Additionally, I rely on a pH-neutralizing pre-rinse containing sodium chlorite rather than alcohol. Alcohol-based mouthwashes dry out the oral mucosa, reducing the natural saliva coating that gives your teeth their healthy, specular reflection under camera lights.
How do I maintain my photogenic dental results over time?
Consistency is key, but you must also avoid over-processing. I maintain my results by scheduling clinical cleanings twice a year to polish away microscopic surface stains that regular brushing cannot touch. According to the official clinical guidelines published by the American Dental Association (ADA), professional dental prophylaxis utilizing selective polishing pastes with low relative dentin abrasivity (RDA) values is the safest, most effective way to maintain surface smoothness without damaging protective enamel layers. Between these professional visits, I strictly adhere to a maintaining your teeth cleaning routine for long term health strategy that focuses on remineralizing toothpastes containing nano-hydroxyapatite to patch up microscopic enamel scratches.
Where the Future of Picture-Perfect Smile Design is Going
We are rapidly moving away from the era of heavy, opaque, “one-size-fits-all” cosmetic enhancements. I predict that the future of cosmetic dentistry lies in 3D-printed biomimetic materials. Within the next few years, we will see custom-printed ultrathin veneers that perfectly mimic the unique refractive index and light-scattering properties of your natural enamel. Instead of completely covering your natural structure, dentists will use AI-driven software to map exactly where light bounces off your face, applying microscopic adjustments only where needed. If you want to stay ahead of the curve, try the simple tongue-positioning trick during your very next photo shoot today, and see the immediate difference in how light reflects off your teeth.
My Hardest Lessons in Chasing the Camera-Ready Smile
The journey to a photogenic smile taught me that what looks good in a highly filtered social media post rarely translates well to the raw reality of a camera lens. Here are the core insights I had to learn the hard way:
- Whiter does not mean brighter. Stripping away natural translucency with heavy chemical bleaches leaves teeth looking grey and dull in low-light environments because the light passes straight through them.
- Friction is the enemy. Abrasive charcoal and whitening toothpastes sand down the glossy outer micro-layers of your enamel, permanently dulling your smile’s natural luster.
- Flat contours look fake. Real teeth have complex, curved anatomy that scatters light naturally; perfectly squared, flat veneers look artificial under studio lighting.
- Maintenance beats modification. Regular, high-quality teeth cleaning secrets are far more effective at improving light reflection than aggressive bleaching cycles.
The Daily Gear That Keeps My Smile Luminous
To keep my enamel reflecting light cleanly without relying on constant chemical whitening, I have curated a specific kit of gentle, high-performance tools:
- High-Frequency Ultrasonic Toothbrush: I use a clinical-grade brush that relies on gentle micro-vibrations rather than abrasive scrubbing action to lift plaque biofilm.
- Nano-Hydroxyapatite Toothpaste: This replaces traditional abrasive formulas, helping to microscopically repair and remineralize tiny scratches on the enamel surface.
- Sodium Chlorite Pre-Rinse: Unlike drying, alcohol-based washes, this maintains a hydrated environment inside the mouth, preserving the natural moisture barrier that gives teeth their glossy, specular reflection.
Stepping into a Brighter Photographic Future
You do not need to hide your smile in group photos or fear the sudden flash of a smartphone camera. True confidence comes from understanding the physics of light and treating your enamel with the gentle care it deserves. By embracing professional polishing and focusing on surface smoothness, you can achieve a radiant, natural look that stands up to any camera lens. Partnering with a skilled professional who understands this balance is key, so consider reading up on finding a dentist who gets your smile tips from top cosmetic pros to make sure you are in expert hands.
Have you ever noticed your teeth looking dull or grey in a specific photo despite feeling confident in the mirror? Let me know about your most challenging camera moments in the comments below!