
I will never forget the exact moment my brand-new aligner tray sliced into the side of my tongue. I was sitting at my desk, trying to focus on a work deadline, and every single micro-movement of my mouth felt like a paper cut. When you invest in Invisalign for adults, you expect some mild pressure and maybe a little soreness. You do not expect a piece of medical-grade plastic to treat your inner cheek like a cutting board. It is frustrating, painful, and makes you want to pop those expensive trays right out and throw them across the room. I made the mistake of trying to push through the pain during my first week, thinking my mouth would just toughen up. Spoiler alert: it didn’t. Instead, I ended up with a nasty mouth ulcer that made eating dinner a nightmare. Today, we are going to fix this. I am going to show you exactly why these sharp edges exist in the first place and share the incredibly simple, safe methods to smooth them down at home so you can get back to comfortable aligning.
Why Brand-New Aligners Can Cut Your Mouth
The truth is that aligners are manufactured in large batches using automated trimming machines. While companies strive for perfection, these machines sometimes leave tiny plastic burrs or slightly uneven borders on the edges of the trays. This is especially true near the back molars or around the cutouts designed for attachments. If you have recently started your journey, you might also be dealing with a new aligner lisp, which means your tongue is constantly rubbing against those fresh, sharp edges as you try to speak normally. It is a recipe for irritation, but it is also completely normal and easily fixable. In fact, a study published by the American Association of Orthodontists highlights that minor mucosal irritation is one of the most common initial complaints among clear aligner patients.
Are you actually allowed to modify your own trays?
I know what you are thinking: “I spent thousands of dollars on this treatment, am I going to ruin my trays if I touch them?” It is a valid fear. When I first felt that sharp plastic edge, I was terrified that if I filed it down, I would somehow warp the plastic or ruin the tracking of my teeth. But here is the secret: smoothing the non-functional outer rim of the plastic—the part that only touches your gums and cheeks—will not affect how the tray moves your teeth. It is completely safe as long as you use the right tools and a very gentle touch. Have you ever had a tray that felt like a tiny saw blade in your mouth? Let me know in the comments below! If you want to make sure your treatment is on the right track, it helps to work with a clinical team that understands these comfort issues; check out how to find a provider by reading about choosing a dentist for your Invisalign transformation to ensure you always have professional support when things get rough.
Step-by-Step Guide to Smoothing Rough Aligner Borders
Fixing a sharp spot on your aligner is like smoothing out a microscopic snag on a fine silk sweater. You do not need industrial machinery; you just need to gently buff away the offending micro-burr without changing the structure of the tray. The first time I tried this, I used a coarse, heavy-duty metal file from my garage. It was a massive mistake. In three seconds, I hacked away way too much plastic, leaving a jagged edge that was ten times worse than the original factory rim. I had to wear that uncomfortable tray for another ten days, feeling every rough groove. Learn from my mistake: subtlety is your absolute best friend here.
Gather Your Gentle Smoothing Kit
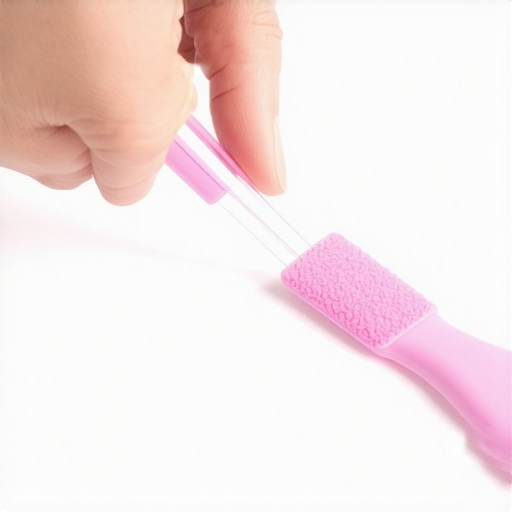
Before you touch your trays, gather the correct, non-abrasive tools. You will need a brand-new, clean emery board (the cardboard kind used for fingernails, preferably with a fine grit side of 240 or higher) and a small piece of dental wax. Avoid metal nail files or electric nail drills, as they generate too much friction heat, which can warp the medical-grade plastic in an instant.
The Buffing Technique That Works
Hold your clean, dry aligner firmly in one hand. Locate the exact spot where the plastic is digging into your gums. Using the fine-grit side of your emery board, apply incredibly light pressure and swipe in a single direction—away from the inside of the tray. Do not saw back and forth. Three or four gentle strokes are usually all it takes to round out a sharp edge. After filing, rinse the tray thoroughly with cool water to remove any plastic dust. If you find your trays consistently smell off after these adjustments, you might want to review how to prevent your invisalign trays from smelling like old socks to keep your hardware fresh.
Use Dental Wax for Immediate Relief
If you are away from home or hesitant to file your trays, dental wax is your temporary savior. Tear off a tiny, pea-sized ball of orthodontic wax, roll it between your fingers to warm it up, and press it directly over the sharp plastic edge or attachment cutout. This creates a smooth, biocompatible barrier between the hard plastic and your delicate mucosal tissue. It is a lifesaver when you are trying to minimize irritation while your tongue adjusts. If you find your teeth feel loose or sensitive during this process, rest assured this is normal; read about why your teeth feel loose during the second month of invisalign to understand how your bone structure adapts to orthodontic pressure.
When to Put the File Down and See Your Dentist
While minor home adjustments are safe, there is a clear line between smoothing a burr and damaging your appliance. If the tray is bent, cracked, or sitting completely unevenly on your teeth, do not attempt to file it down. Damaging the active portion of the plastic can derail your entire alignment schedule. Always make sure you are practicing good oral hygiene alongside your treatment. If you are experiencing unexpected gum sensitivity during this phase, it might be time to look into teeth cleaning for sensitive teeth what works best in 2025 to keep your mouth healthy and pain-free as your smile transforms.
The Great Aligner Misconception That Might Be Ruining Your Progress
Everyone tells you that clear aligners are a simple, set-it-and-forget-it cosmetic solution. Many patients believe that if a tray hurts or irritates their gums, they should simply leave it out for a few hours to “give their mouth a break.” In my experience, this is the single biggest mistake you can make. The truth is that inconsistent wear time actually prolongs the initial discomfort. When you remove your trays for extended periods, your teeth begin to shift back, meaning every time you pop them back in, you are restarting the painful adaptation cycle from scratch. Instead of finding relief, you are trapped in a loop of perpetual soreness.
Why does my new tray feel like it fits differently than the last one?
Many advanced patients get nervous when a new tray in their cycle feels slightly looser or tighter in weird spots compared to the previous one. They worry the factory made a mistake. However, a study published in the Journal of Orofacial Orthopedics confirms that orthodontic force distribution is designed to target specific teeth at different phases of your treatment. Your current tray might be focusing purely on rotating a single bicuspid, leaving other teeth with minimal pressure. If you want to make sure you are managing this complex process correctly, check out our guide on Invisalign maintenance expert tips for clear confident smiles to keep your treatment flawless.
Another common “trap” is assuming that any dentist can deliver the exact same cosmetic results because the software does the planning. This couldn’t be further from the truth. The software is just a tool; the human doctor must manually override computer-generated movements to prevent root damage and ensure your bite aligns correctly. Before committing to treatment, it is vital to learn about choosing the right dentist expert tips for your best smile journey to avoid tracking failures down the road.
The Dangerous Mistake of Over-Cleaning Your Aligners
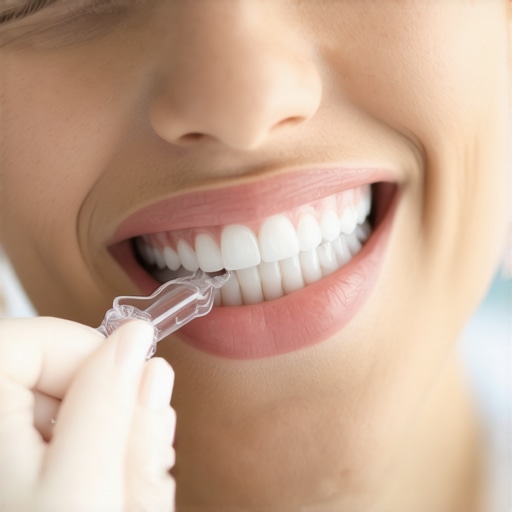
In an effort to keep their trays pristine, many patients resort to harsh chemicals, boiling water, or vigorous scrubbing with highly abrasive toothpastes. This is a massive mistake that can permanently ruin your expensive hardware. Boiling water will warp the medical-grade plastic instantly, making the tray completely useless. Abrasive toothpastes create microscopic scratches on the surface of the plastic. These tiny grooves act as perfect breeding grounds for plaque and odor-causing bacteria, which is the real reason your teeth feel sticky after drinking soda or even water while wearing them. Stick to gentle, non-abrasive crystals or specialized cleaning tablets to protect the integrity of your trays.
Have you ever fallen into this trap or accidentally warped a tray trying to clean it? Let me know in the comments below! If you are ready to take the next step and want professional guidance on your smile transformation, feel free to visit our page on how to contact us to schedule a detailed consultation.
Once you survive the initial discomfort of sharp plastic borders, your focus must shift to the long-term mechanics of keeping that investment spotless and perfectly tracked. Getting through your weekly tray changes is only half the battle; the real victory is maintaining that progress without wearing down your enamel or ruining your expensive hardware. Over my years of managing clear aligners, I have realized that standard bathroom tools simply do not cut it. You need a highly specific maintenance kit to protect your oral health and ensure your teeth actually stay in their final, ideal positions.
How do I maintain my alignment results over time?
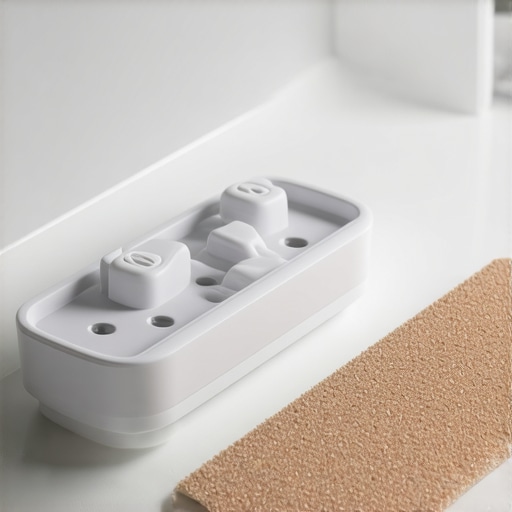
The secret lies in transition planning and professional-grade maintenance. Many people assume that once the last tray is finished, the work is done. In reality, the bone surrounding your newly moved teeth takes months to fully calcify and solidify. This is why a custom retainer protocol is vital. To keep everything functioning flawlessly, I personally rely on a dedicated ultrasonic cleaning chamber combined with safe, non-abrasive pH-neutral tablets rather than brushing my hardware with regular toothpaste. Practicing consistent care is crucial during this phase; you can explore Invisalign maintenance expert tips for clear confident smiles to protect your teeth from shifting back.
In addition to home care, you must keep up with regular professional scaling. Plaque can build up rapidly around active attachments, and no home toothbrush can completely clear the microscopic tartar that forms in those tight crevices. To ensure your teeth remain healthy and free from decay underneath your trays, look into the latest dental technologies by reading about modern teeth cleaning innovations that reduce sensitivity and boost results to keep your deep cleanings comfortable and highly effective.
The Future of Smart Aligners and Virtual Tracking
Looking ahead, the field of clear orthodontics is moving rapidly toward continuous biometric monitoring. Companies like DentalMonitoring are already pioneering smartphone-based AI scanning, allowing your provider to track microscopic tooth movements via a weekly selfie. I predict that within the next three years, we will see smart aligners embedded with micro-sensors that actively track your daily wear-time and saliva pH levels, sending real-time alerts directly to an app on your phone. This level of technology takes the guesswork out of the process, ensuring you never move to a new tray before your bone structure is fully ready.
As you plan for your long-term smile transformation, remember that cosmetic dental care is a lifetime commitment. Whether you are correcting minor crowding or looking into comprehensive aesthetic enhancements, finding a skilled clinical team is the most critical decision you will make. I highly recommend taking a moment to review our comprehensive guide on the ultimate guide to teeth whitening and cosmetic enhancements to learn how modern treatments work together to build a radiant, confident smile.
The Hardest Lesson I Learned About Adult Aligners
When I first embarked on my clear aligner journey, I mistakenly believed that the physical trays did 100% of the heavy lifting. I learned the hard way that orthodontic success is actually a partnership between advanced engineering and daily habit discipline. The absolute hardest lesson was realizing that minor, temporary discomfort—like a sharp plastic edge or a tight fit—is not a sign of failure, but a sign of active transformation. If you run to take your trays out every time they pinch, you delay the bone-remodeling process and prolong your own discomfort. Embracing the micro-adjustments and staying consistent is what separates those who achieve a Hollywood smile from those who abandon their trays in a drawer.
My Essential Toolkit for Comfort and Maintenance
To make your alignment process as seamless as possible, I highly recommend curating a dedicated care kit. Here are the specific tools I personally trust and recommend to keep your treatment on track:
- Ultra-Fine Emery Boards (240+ Grit): The absolute safest tool for gently buffing away manufacturing burrs without warping the medical-grade plastic.
- Orthodontic Dental Wax: Your instant, pocket-sized savior for creating a smooth barrier over sharp edges when you are on the go.
- Ultrasonic Cleaner: A game-changer for deep-cleaning your hardware without using abrasive toothpastes that scratch and ruin the plastic.
- Professional Clinical Support: No tool replaces an expert eye. If you want to ensure your treatment is properly managed from start to finish, take time to learn about choosing the right dentist expert tips for your best smile journey.
Your Turn to Achieve a Radiant Smile
Your path to a confident, healthy smile is a beautiful investment in yourself. While the first few weeks of wearing Invisalign for adults can feel overwhelming with all the new sensations and maintenance steps, it quickly becomes second nature. Don’t let a temporary rough edge or minor lisp discourage you from achieving the results you deserve. Stay consistent, keep your hardware clean, and trust the engineering behind your treatment. Have you ever struggled with a sharp aligner tray or a stubborn attachment? Let me know in the comments below!