
Picture this: It is Saturday evening, your favorite movie is playing, and you have just settled in with a bowl of popcorn. You take one bite, hear an ominous crunch, and suddenly feel a cold, empty gap in your smile. Your dental crown has completely popped off. Your stomach drops because you know every dental clinic in town is closed until Monday morning. I have been exactly in those shoes, and in my panic, I made the classic mistake of trying to use superglue to put it back—a disastrous move that almost ruined my natural tooth. Today, I am going to save you from that nightmare and show you exactly how to protect your tooth, manage the discomfort, and keep your sanity intact until you can get to the clinic.
Do Not Panic: Your 48-Hour Survival Plan
Losing a crown is not an immediate life-threatening emergency, but it certainly feels like one when your tongue keeps touching that raw, sensitive stump of a tooth. The absolute first thing you must do is find the crown. Gently rinse it off and put it in a safe place. Your exposed tooth is now vulnerable to temperature changes and bacteria. If you have some leftover sugarless gum, you can use it to cover the sharp edge temporarily, which is a great trick for managing a sharp edge on a broken tooth until you can see a professional. Your main goal right now is simply keeping the area clean and protected.
Is my tooth going to rot before Monday?
It is easy to worry that a couple of days of exposure will completely ruin your tooth. Fortunately, a brief weekend delay will not cause instant decay, but it will be highly sensitive. According to clinical guidance from the American Dental Association, keeping the tooth clean and avoiding chewing on that side of your mouth is usually sufficient for short-term management. To protect the nerve from cold air and warm soup, you can buy over-the-counter temporary dental cement at your local pharmacy. Just make sure you never force the crown back on if it does not fit easily, or you might end up needing some serious cosmetic dentistry innovations to repair the physical damage. Have you ever had a dental emergency strike at the absolute worst possible moment over the weekend? Let me know in the comments below!
How to Safely Re-Secure Your Crown at Home
Think of your dental crown as a customized helmet protecting a highly sensitive, nerve-rich stump of a tooth. When that helmet falls off, the underlying structure is as vulnerable as a freshly peeled potato left out in the sun. If you want to avoid agonizing pain when taking a breath of cold air or drinking lukewarm water, you need to seal that barrier immediately. This is not about permanent repair; it is about keeping the environment sealed until you can get into the dental chair.
Clean the Tooth and Crown Separately
Before you even touch a tube of temporary cement, you must prep both surfaces. If you attempt to glue the crown back on with old cement or food particles trapped inside, it will sit too high, ruining your bite and putting excessive pressure on the root. Take a soft-bristled toothbrush and gently clean the exposed stump in your mouth. Next, use a toothpick or a clean dental scaler to scrape away any flaky, dry cement from the inside of the crown. Rinse the crown thoroughly under warm water and let it air dry. If your gums feel incredibly raw or look puffy during this cleanup, it might be due to localized irritation, much like the reason your gums feel spongy after a weekend of heavy snacking. Cleanliness is your absolute best defense against trapping bacteria under the temporary seal.
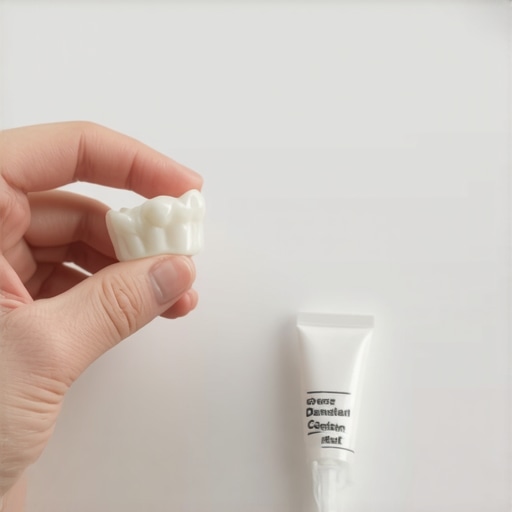
The Dry Run and Cement Application
Never apply cement without doing a dry run first. Place the dry crown back onto your tooth to make sure you know exactly how it aligns. Once you are 100% sure of the orientation, head to your local pharmacy and purchase an over-the-counter temporary dental cement or filling material. Squeeze a tiny, pea-sized amount of the temporary cement inside the hollow of the crown. Place the crown over your tooth and press down firmly with your finger. To ensure it is fully seated, bite down gently on a piece of wet paper towel or a cotton roll for about two to three minutes. I remember when my own crown popped off on a flight to Chicago; I rushed into an airport restroom and tried to skip the dry run. I ended up placing the crown backward, which made my bite feel incredibly lopsided and forced me to pry it off again while my gums bled. Do not rush this. Take your time to align it perfectly.
Clean Up the Excess and Let It Set
Once the crown is in place, you will notice excess cement squeezing out around the gumline. Leave it alone for about ten minutes to let it partially harden. Once it reaches a rubbery consistency, use a toothpick or a piece of floss to gently clear the excess away from your gums. If you use floss, pull it through the side of the tooth rather than snapping it back up, which could dislodge your freshly cemented crown. After the cleanup, avoid chewing any hard or sticky foods on that side of your mouth entirely. Keep your cleaning routine gentle; this is not the time for aggressive scrubbing. If you use a high-tech brush, be careful, as you might wonder why your jaw feels like it is vibrating when you use an electric toothbrush on an unstable tooth structure. Stick to soft foods like yogurt, applesauce, or mashed potatoes until your dentist can properly assess the tooth and apply medical-grade adhesive.
While securing your crown with temporary pharmacy cement is a fantastic weekend stopgap, many patients unknowingly fall into a subtle, counterintuitive trap during the recovery phase. We are taught that clean teeth are healthy teeth, so your instinct might be to scrub that newly cemented crown with extra vigor. However, aggressive brushing is actually the quickest way to micro-fracture temporary cement seals, allowing microscopic bacteria to seep underneath. Let us dig deeper into the actual science of temporary dental bonds and how the common myths of cosmetic maintenance can lead to long-term structural failure.
Why does my tooth feel loose during the second month of Invisalign or after temporary dental work?
Many patients confuse the natural, temporary mobility of a tooth undergoing orthodontic shift with the structural instability of a failing crown or veneer. According to a landmark study published in the Journal of Clinical Orthodontics, controlled orthodontic force temporarily remodels the alveolar bone, which naturally makes teeth feel slightly mobile. This is a normal physiological process, but if you experience this sensation with a crown, it is a structural warning sign rather than a biological shift. You can read more about why your teeth feel loose during the second month of Invisalign to better understand how bone remodeling differs from a failing restoration.
The Traps of DIY Tooth Cleaning and Aesthetic Maintenance
Everyone tells you to keep your mouth pristine, but in my experience, over-cleaning a compromised crown does far more harm than good. A common mistake is using highly abrasive whitening toothpastes, which often rely on silica or charcoal particles to scrub away surface stains. On natural enamel, these abrasives are harsh enough, but on temporary dental cement, they act like sandpaper, slowly eroding the margins around your gum line. Once that margin is breached, saliva and sugary liquids get sucked under the crown via capillary action, creating a perfect, oxygen-free breeding ground for rapid tooth decay.
Another sophisticated trap is relying on a water flosser. While these high-tech tools are phenomenal for general hygiene, directing a pressurized jet of water directly at the base of a temporarily cemented crown can hydraulic the restoration right off its prep. If you want to keep the area clean, stick to a manual, ultra-soft toothbrush and avoid the gumline of the affected tooth with any high-pressure water streams. For general care, understanding the underlying facts can save you from catastrophic failures, as detailed in our guide on teeth cleaning myths debunked by top dentists. Have you ever fallen into this trap and accidentally dislodged your own dental work? Let me know in the comments below!
When Temporary Solutions Mask a Deeper Cosmetic Issue
Sometimes, a crown popping off is not just bad luck; it is a symptom of an underlying bite misalignment or micro-bruxism. If your teeth do not meet perfectly, you put uneven lateral force on your restorations every time you chew or sleep. Simply cementing the crown back on repeatedly without addressing the root cause is like patching a tire without aligning the wheels. Modern cosmetic dentistry offers comprehensive alignment methods to distribute these biting forces evenly across your entire arch, ensuring your crowns last for decades rather than months. If you are tired of constant dental emergencies, exploring clear aligners might be the permanent solution you need. Discover why so many adults are choosing this route by reading about why Invisalign is the future of clear braces.
How do I maintain my dental restorations and clear aligners over time?
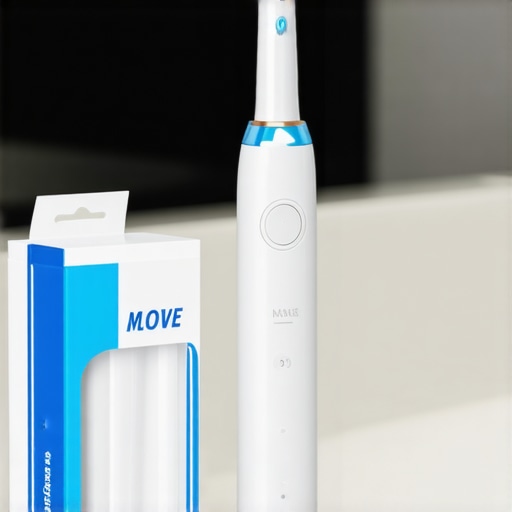
Keeping high-end cosmetic dental work functioning flawlessly is less about dramatic interventions and more about the exact tools and daily habits you choose. When you have invested in a gorgeous smile, maintaining it requires moving away from supermarket-shelf solutions. Personally, I rely on a curated selection of tools that preserve the delicate bond of your dental restorations without causing wear. First, ditch the aggressive manual brushes and invest in an electric toothbrush with a built-in pressure sensor. This sensor is crucial because it physically stops you from applying the micro-abrasive force that degrades temporary and permanent cements alike. However, do not just turn it on and scrub; use a soft-bristled head and let the micro-vibrations do the work for you. For daily hygiene without the risk of popping off a crown or veneer, I highly recommend using a high-quality expandable dental floss. It gently expands to grab plaque in tight spaces without the snapping force that dislodges crowns.
If you are wearing clear aligners to fix your bite alignment, maintenance is just as critical to prevent staining and structural warping. I always recommend using a dedicated, non-abrasive cleanser. For instance, cleaning your trays with cheap dish soap or standard toothpaste will microscopic scratch the plastic, creating tiny grooves where bacteria multiply and make your aligners smell foul. Instead, use specialized cleaning tablets or mild, unscented soap. If you want to dive deeper into this process, you can read our guide on Invisalign maintenance expert tips for clear confident smiles. I predict that in the very near future, we will see smart dental aligners embedded with micro-sensors that monitor wear time and oral pH levels in real-time, giving patients instant feedback through a smartphone app to optimize their treatment.
My Personal Gear Guide for Long-Term Smile Protection
To keep my own smile in pristine condition, I do not rely on guesswork. I use a daily physical diary to track my aligner wear time, combined with an ultra-soft, tapered-bristle brush. Clinical studies from the International Journal of Dentistry confirm that tapered bristles penetrate deeper into the gingival sulcus without causing the micro-recession that exposes vulnerable crown margins. If you are serious about protecting your investment, I challenge you to try this advanced tip tonight: swap out your standard floss for a specialized proxy brush or expandable floss, and focus on pulling the thread horizontally through the gaps rather than snapping it upward. This simple mechanical shift eliminates upwards tensile stress on your dental work, preserving the bond for years to come. To ensure you are on the absolute right path for your oral health journey, it is always wise to consult with professionals who understand your unique needs; check out our expert advice on choosing the right dentist expert tips for your best smile journey.
When a dental crown pops off, it can feel like a major disaster, but with the right steps, you can safely manage the situation until you see your dentist. Let us look at what we can learn from this common emergency to protect your smile for the future.
The Hardest Lessons I Learned After My First Dental Emergency
Experiencing a sudden restoration failure teaches you things that no standard dental pamphlet ever covers. Here are a few lightbulb moments that completely changed how I treat my teeth:
- Your saliva is highly acidic: When you lose a crown, the exposed tooth structure is incredibly vulnerable. Saliva alone can accelerate sensitivity and microscopic decay if left exposed for more than a few days without a temporary seal.
- Never force a misplaced crown: If you try to push a crown back on and your bite feels uneven, stop immediately. Biting down on a misaligned crown can crack the underlying natural tooth, turning a simple re-cementing job into an extraction.
- Aggressive cleaning is the enemy of stability: Gently cleaning the area is vital, but scrubbing a loose or temporarily cemented crown can micro-fracture the delicate bond. Gentle sweeps are always better than hard scrubbing.
The Smile Protection Tools I Keep in My Medicine Cabinet
You do not want to be running to a 24-hour pharmacy at midnight. Keeping a few specific, professional-grade tools on hand ensures you are always prepared for any cosmetic or restorative issue:
- Over-the-Counter Temporary Dental Cement: Look for products containing zinc oxide eugenol, which naturally soothes irritated tooth nerves while creating a tight temporary seal.
- An Ultra-Soft, Tapered-Bristle Toothbrush: Tapered bristles gently sweep around loose crown margins without lifting the edges. If you normally use an electric brush, switch to a gentle manual one during dental emergencies to avoid high-frequency vibrations.
- Expandable Dental Floss: This type of floss expands in the gaps to grab debris without snapping. Remember, if you must floss near a compromised crown, always pull the floss out sideways rather than pulling it upward.
- Non-Abrasive Cleansers: If you wear clear aligners to fix bite issues, keeping them pristine is vital. Avoid abrasive pastes that create micro-scratches where bacteria hide; instead, learn how to prevent your Invisalign trays from smelling like old socks using gentle, specialized soaking tablets.
Take Control of Your Oral Health Journey
A loose crown or an unexpected chip is merely a temporary bump on your road to a lifetime of confident smiles. Don’t let a weekend emergency discourage you from maintaining your routine. By taking calm, systematic steps to protect your teeth today, you ensure that your investments in cosmetic dentistry trends that transform smiles beyond expectations stay beautiful and functional for decades to come.
Have you ever had a dental crown pop off at the absolute worst possible moment? Let me know how you handled it in the comments below!