
You are sitting at a dimly lit restaurant, enjoying a perfectly seared steak, when you hear a sickening, muffled crunch. It is not the crust of the bread. It is the distinct sound of your temporary dental bridge snapping right in half. Suddenly, your tongue is swimming in panic, feeling a jagged gap and a loose piece of acrylic. Your heart sinks. I know this exact feeling because I lived it. Years ago, during a weekend getaway, my own temporary bridge split during the main course, and instead of asking for help, I made the amateur mistake of trying to superglue it back together in the restroom. Trust me on this: do not do that. Today, I am going to share the exact, stress-free blueprint to handle this dental emergency with your dignity and your oral health fully intact.
Have you ever had a dental restoration fail at the absolute worst possible moment?
Take a Deep Breath and Keep the Pieces Safe
It is easy to spiral into panic when your smile suddenly feels compromised, but a broken temporary is not a life-threatening disaster. First, gently retrieve any broken pieces from your mouth so you do not accidentally swallow or inhale them. According to clinical guidance from the American Dental Association, swallowing dental prosthetics can lead to serious airway issues, making retrieval your immediate priority. Once you have the pieces, rinse them in cool water and store them in a clean container or a plastic bag. If you are currently dealing with a bulky temporary that is still intact but hard to clean, you might also want to learn the trick to flossing around a bulky temporary bridge to prevent future irritation. Keep these pieces safe, because your dentist might actually be able to repair and re-cement the exact same temporary to save you time.
Is it safe to wait a few days to get this fixed?
This is the number one question people ask when their temporary bridge fails over a weekend or during a vacation. The short answer is: you can wait a couple of days, but you must not ignore it entirely. Temporaries are not just for aesthetics; they hold your surrounding teeth in place. Without that physical barrier, your natural teeth can actually begin to shift in as little as 48 hours, which can ruin the fit of your custom-made permanent bridge currently being crafted at the lab. If you are also in the middle of other alignment treatments, you already know how fast teeth love to move, much like why your teeth feel loose during the second month of invisalign as things shift. To manage any exposed, sharp edges of the remaining tooth structure while you wait for an appointment, you can grab a pack of dental wax from a local pharmacy, or as a temporary emergency hack, learn how to manage a sharp edge on a broken tooth with sugarless gum until you can get into the dental chair.
Step-by-Step Action Plan to Manage a Broken Temporary Bridge
When my temporary bridge split in two during that infamous weekend dinner, my immediate reaction was sheer embarrassment. I scrambled to the bathroom, dug a tiny tube of superglue out of my travel kit, and tried to fuse the acrylic back together. It was a disaster. Not only did the chemical taste burn my tongue, but the glue also created an uneven bump that prevented my jaw from closing properly. When I finally saw my dentist, he had to spend extra time scraping toxic adhesive off my prepped teeth. To help you avoid that same messy situation, here is the exact, stress-free protocol you should follow instead.
Evaluate the Prep Site Gently
Your first task is to assess what is left in your mouth. Use a clean finger or your tongue to feel the prepped abutment teeth—the shaved-down teeth that support the bridge. If the prepped teeth are completely covered by a remaining portion of the bridge, you are in good shape. However, if the underlying tooth structure is fully exposed to the open air, it will likely be highly sensitive to cold water and warm food. You can shield these sensitive areas by applying a small pea-sized dollop of over-the-counter dental wax directly over the exposed stumps. This wax acts like an insulated winter coat, keeping cold air and liquids from triggering sharp nerve pain.
Pick Up a Temporary Dental Adhesive
Do not head to the hardware aisle. Instead, walk into any local pharmacy and look for temporary dental cement or denture adhesive paste. These products are specifically designed for oral use, meaning they are non-toxic, water-soluble, and easy for your dentist to remove later. Before applying the paste, dry both your prepped natural teeth and the inside of the temporary bridge using a clean cotton swab. Moisture is the enemy of adhesion; even a tiny drop of saliva can prevent the temporary cement from grabbing hold. Apply a very thin layer of cement inside the hollow caps of the bridge, press it firmly back onto your teeth, and bite down gently to squeeze out any excess material. 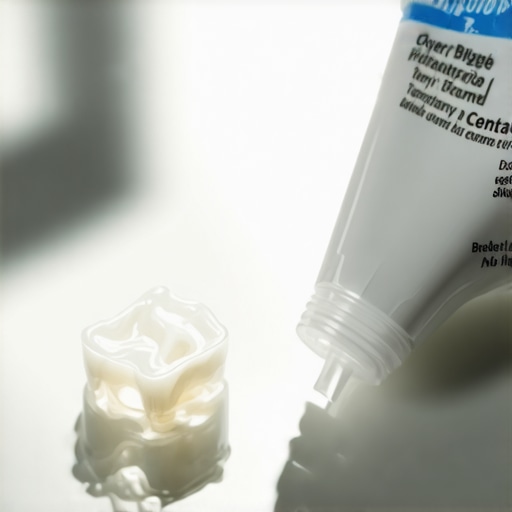
Modify Your Eating Habits Immediately
Once you have stabilized the temporary bridge, you must treat it like a fragile glass sculpture. This is not the time to test your teeth on hard rolls, chewy candies, or thick steaks. Keep your diet strictly to soft foods like yogurt, mashed potatoes, and scrambled eggs. When you chew, consciously shift the food to the opposite side of your mouth to minimize the mechanical pressure on the healing site. Taking these precautions is just as vital as keeping up with regular maintaining your teeth cleaning routine for long-term health. If you must clean around the area, avoid pulling floss upward, which can easily snag and pop the loose temporary back out of place; instead, slide the floss out horizontally through the side of the teeth.
Call Your Dentist to Align the Schedule
Even if you successfully glue the temporary back into place and feel zero pain, you still need to notify your dental team. A temporary bridge is a temporary fix, and your natural teeth are constantly looking for excuses to drift. If you wait too long, the custom permanent bridge being made at the lab might not fit, forcing the dentist to take new impressions and start the entire process over. Think of this intermediate phase as being similar to orthodontic care, where consistency is everything. For instance, skipping appointments or wearing loose appliances can cause major setbacks, much like how patients experience shifts and must learn why your invisalign aligners feel tight every monday morning when their routine is slightly altered. Call your provider, explain that the temporary has broken, and let them decide whether they need to squeeze you in for a quick five-minute re-cementing appointment or if you can safely wait for your scheduled delivery day.
When you are dealing with a fractured temporary restoration, it is easy to assume you just bit down too hard on a piece of crusty bread. But let us dig deeper. As someone who has spent years analyzing these exact dental frustrations, I can tell you that the structural failure of a temporary bridge is rarely just about the food you eat. There is a complex mechanical dance happening inside your mouth, and understanding these hidden nuances can save you from a cycle of repeated emergency office visits.
The Flexing Tooth Myth Most People Believe
Everyone tells you that temporaries break because the acrylic material is cheap or weak. While it is true that temporary resins lack the reinforced strength of zirconia or porcelain, the real culprit is structural flexing. Your lower jaw actually twists and flexes slightly when you chew or yawn. When a rigid temporary bridge spans across multiple teeth, it cannot absorb this natural micro-movement. Instead of bending with your jaw, the material shears at its weakest point—typically the thin connector joint between the artificial tooth and the supporting crown. If you are also undergoing orthodontic alignment, this tension is multiplied because your teeth are already in a state of active movement, which explains why patients often wonder why your teeth feel loose during the second month of invisalign as their bone structure remodels. Embracing cosmetic dentistry myths debunked by top dentists helps clarify that temporaries are meant to act as sacrificial barriers, absorbing jaw stress to protect the delicate prepped teeth underneath.
Why does my bite feel completely different after the temporary breaks?
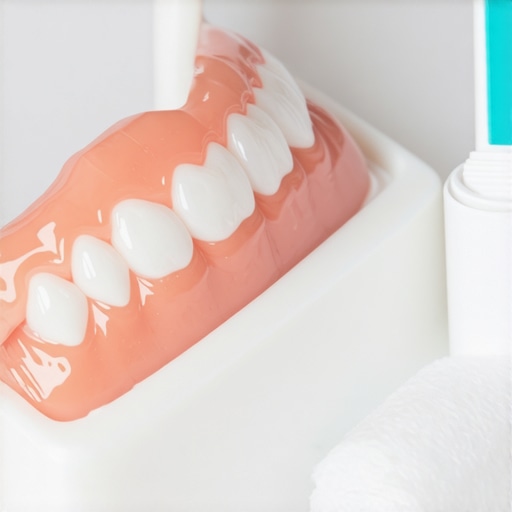
An advanced nuance that patients often overlook is the rapid eruption of opposing teeth. When a temporary bridge breaks or falls out, the tooth directly above or below it loses its chewing partner. According to research published in the Journal of Prosthetic Dentistry, opposing teeth can begin to micro-erupt—essentially drifting vertically to find contact—in a matter of days. This tiny shift, while invisible to the naked eye, is why your bite feels incredibly high or off-balance when you try to put the broken temporary back in. To avoid permanently throwing off your alignment, you must resist the urge to force a broken bridge back onto your teeth if it resists gentle pressure. Working with professionals who understand these delicate dynamics is essential, which is why choosing the right dentist makes all the difference in managing these precise cosmetic transitions.
The Saliva Contamination Trap You Must Avoid
If you choose to use an over-the-counter temporary cement to secure your bridge at home, you are stepping into a high-stakes chemical battle. The absolute biggest mistake people make is failing to control moisture. Your saliva is packed with enzymes and proteins designed to break down organic matter. If even a microscopic film of spit remains on your prepped tooth when you apply the cement, it will contaminate the bonding surface. The cement will fail to crystallize properly, turning into a gritty paste that washes away within hours. For a bond that actually holds, you must isolate the area with cotton rolls, breathe strictly through your mouth to keep the prep site dry, and blast the tooth with cool air before seating the bridge. This meticulous attention to cleanliness is just as vital as understanding how regular care boosts oral health at any age to prevent underlying decay. Have you ever fallen into this trap and had your DIY cement job wash away within an hour? Let me know in the comments below.
While dealing with the immediate chemistry of saliva and dental adhesive is crucial, long-term success with temporary restorations comes down to daily maintenance and the right tools. Over the years, I have refined my personal dental toolkit to prevent these mid-meal disasters. My absolute go-to recommendation is not a fancy mechanical gadget, but a specific type of specialized flossing tool: the stiff-ended floss threader. Standard dental floss is too flexible to navigate under the connected crowns of a bridge, which often leads to patients pulling upward and snapping the temporary right off its prepped foundation.
By using a threader with a rigid, plastic-like tip, you can easily guide the floss through the small gap near the gumline and pull it out horizontally. This technique completely eliminates the vertical tension that dislodges temporary restorations. I personally pair this with a high-quality water flosser on its lowest pressure setting to gently rinse away debris. In fact, understanding why your dental hygienist uses a water flosser instead of manual tools shows just how effective micro-bubbles and controlled water streams are at preserving delicate, temporary dental work without causing physical damage.
How do I maintain my temporary dental work over time?
Maintaining a temporary bridge over several weeks requires a strict balance of gentle hygiene and preventative habits. First, replace your manual toothbrush with an extra-soft bristled version and brush with light, circular strokes rather than a sawing motion. Second, never use whitening toothpastes on your temporary; these formulas contain highly abrasive particles like silica that can scratch the acrylic, making it porous and much more susceptible to plaque buildup. If you are also wearing clear aligners, you should apply the same level of rigorous care, utilizing professional strategies for invisalign maintenance and expert tips to keep your entire smile healthy and clean. According to clinical guidelines published by the American College of Prosthodontists, maintaining pristine tissue health around temporary abutments is the single most critical factor in ensuring the final permanent restoration bonds successfully without bleeding or chronic inflammation.
Looking ahead, the future of temporary dental restorations is moving rapidly away from hand-mixed acrylics. I predict that by 2026, chairside 3D printing will completely dominate the cosmetic dentistry landscape. Instead of brittle temporary resins, dentists will utilize 3D-printed, graphene-reinforced polymers that are virtually indestructible, eliminating the emergency broken-bridge appointment altogether. For now, if you are currently navigating a tricky temporary phase or planning a larger smile makeover, I highly encourage you to try the horizontal flossing method tonight. Taking proactive control of your daily routine is the best way to safeguard your transition toward a flawless, permanent smile.
While dealing with the immediate chemistry of saliva and dental adhesive is crucial, long-term success with temporary restorations comes down to daily maintenance and the right tools. Over the years, I have refined my personal dental toolkit to prevent these mid-meal disasters. My absolute go-to recommendation is not a fancy mechanical gadget, but a specific type of specialized flossing tool: the stiff-ended floss threader. Standard dental floss is too flexible to navigate under the connected crowns of a bridge, which often leads to patients pulling upward and snapping the temporary right off its prepped foundation.
By using a threader with a rigid, plastic-like tip, you can easily guide the floss through the small gap near the gumline and pull it out horizontally. This technique completely eliminates the vertical tension that dislodges temporary restorations. I personally pair this with a high-quality water flosser on its lowest pressure setting to gently rinse away debris. In fact, understanding why your dental hygienist uses a water flosser instead of manual tools shows just how effective micro-bubbles and controlled water streams are at preserving delicate, temporary dental work without causing physical damage.
How do I maintain my temporary dental work over time?
Maintaining a temporary bridge over several weeks requires a strict balance of gentle hygiene and preventative habits. First, replace your manual toothbrush with an extra-soft bristled version and brush with light, circular strokes rather than a sawing motion. Second, never use whitening toothpastes on your temporary; these formulas contain highly abrasive particles like silica that can scratch the acrylic, making it porous and much more susceptible to plaque buildup. If you are also wearing clear aligners, you should apply the same level of rigorous care, utilizing professional strategies for invisalign maintenance and expert tips to keep your entire smile healthy and clean. According to clinical guidelines published by the American College of Prosthodontists, maintaining pristine tissue health around temporary abutments is the single most critical factor in ensuring the final permanent restoration bonds successfully without bleeding or chronic inflammation.
Looking ahead, the future of temporary dental restorations is moving rapidly away from hand-mixed acrylics. I predict that by 2026, chairside 3D printing will completely dominate the cosmetic dentistry landscape. Instead of brittle temporary resins, dentists will utilize 3D-printed, graphene-reinforced polymers that are virtually indestructible, eliminating the emergency broken-bridge appointment altogether. For now, if you are currently navigating a tricky temporary phase or planning a larger smile makeover, I highly encourage you to try the horizontal flossing method tonight. Taking proactive control of your daily routine is the best way to safeguard your transition toward a flawless, permanent smile.
The Hardest Lesson I Learned About Temporary Dental Bridge Failures
Looking back at my own dental misadventures, the experience of snapping a temporary restoration taught me valuable perspective shifts that you won’t find in a standard medical textbook. Here is the raw insider wisdom I wish someone had shared with me beforehand:
- The temporary is a sacrificial shield, not a permanent shield. Its primary job is to keep your prepped teeth aligned and comfortable. If it breaks under stress, it often saves your natural underlying teeth from taking that direct, damaging impact.
- Do not let embarrassment delay your treatment. Dentists see broken temporaries every single week. Trying to hide the gap or fix it with household glues out of embarrassment will only complicate your final seat appointment.
- Tissue health dictates your final result. If you let plaque build up around the broken site, your gums will swell. When you return to the office, the inflamed tissue will make it incredibly difficult for the dentist to bond your permanent crown cleanly. Keep the area pristine.
My Essential Dental Survival Kit for Restoration Transitions
When you are in the middle of a major cosmetic change, you cannot rely solely on standard brushing. I recommend assembling a specialized emergency pouch containing these specific, trusted items:
- Dentemp or Temparin Max: These are over-the-counter temporary filling and cap materials that use zinc oxide and eugenol. They offer immediate pain relief for exposed nerves and a reliable, short-term bond.
- Unflavored Dental Wax: A lifesaver for shielding sharp edges. Opt for unflavored varieties, as artificial mint oils can sometimes irritate open dentin tubules on exposed prep sites.
- A Soft-Bristled Orthodontic Brush: These brushes have a V-groove channel designed to clean around bulky attachments and bridges without snagging delicate margins.
- A Dedicated Dental Mirror with LED Light: This allows you to inspect the back of your prepped teeth yourself, ensuring no food debris is trapped under a loose restoration before you apply temporary cement.
Step Confidently Toward Your New Smile
A broken temporary bridge can feel like a massive setback, but it is actually just a small, manageable bump on your path to a beautifully restored mouth. By staying calm, keeping the site clean, and using the proper tools, you protect the investment you have made in your oral health. Modern cosmetic dentistry has made these transitions smoother than ever, and a brief detour with a broken acrylic piece won’t stop you from achieving your goals.
Have you ever had a temporary dental bridge or crown pop loose at the absolute worst possible moment? Let me know in the comments below how you handled it!